-1.png?width=1150&height=344&name=Priceline%20Agoda%20Global%20Partner%20Services_Full%20Logo%20(23)-1.png)
.png)
Get the most out of Partner Portal
Priceline Agoda's extranet, Partner Portal, helps you manage every part of your property from one place.
| • Manage bookings and payment | • Access analytic tools |
| • Select your competitor set | • Activate promotions |
| • Update contact information |
Payment
Each booking is delivered into your property management system with the reservation details and a unique payment card, or UPC, attached. Priceline Agoda offers three ways to collect payment: a single-use virtual card (UPC), a batched virtual card for settling several bookings at once (UPC on ePass), or a direct transfer to your registered bank account (Telex Transfer). Each has its own guide with full setup, settlement, and troubleshooting steps:
Managing your bookings
We offer two ways to check your Priceline Agoda bookings: through Partner Portal, or by email.
Partner Portal
- Go to Partner Portal > Reservations > View Bookings.
- Select your criteria and click Search.
- The booking status is shown by the text color of the Booking ID. A confirmed booking appears in green.
When a guest makes a booking, the confirmation voucher is sent to the email addresses registered to the Booking Confirmation subscription in Partner Portal.
Your registered email address is defined in Contacts > Subscriptions > Reservations. You can add multiple registered addresses to receive the booking confirmation voucher.

↑ Back to top
Promotions
Promote your property to target audiences and increase your bookings.
Activating a promotion
Sign in to Partner Portal. If you manage multiple properties, select it from Listings.
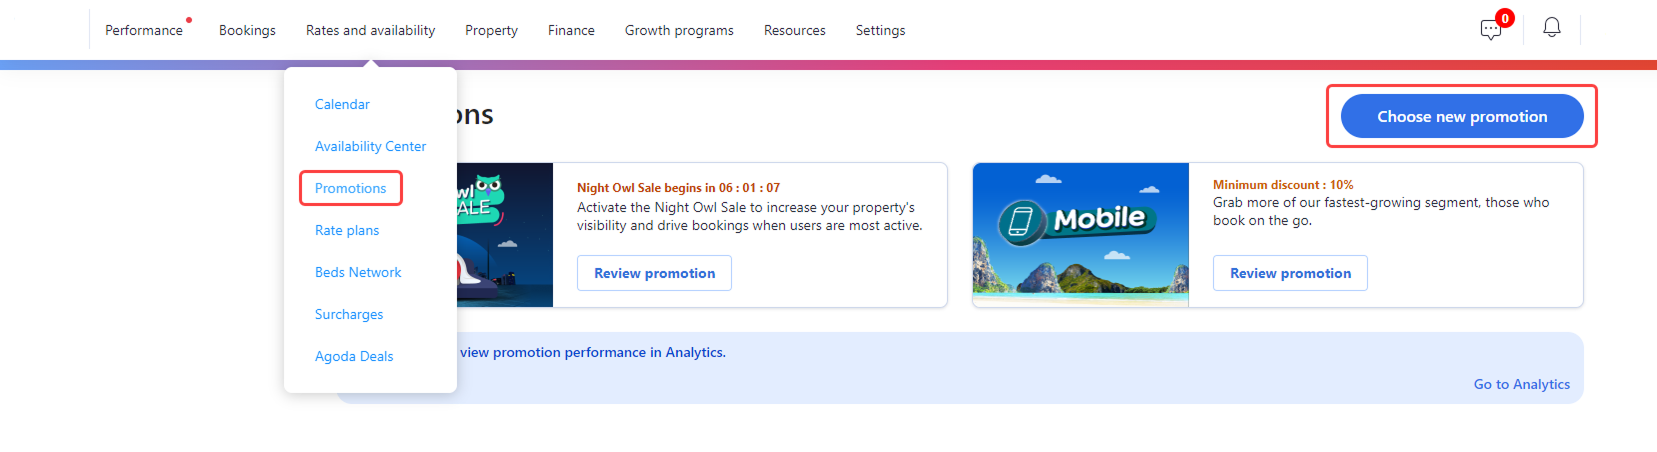
- Go to Rates and availability > Promotions.
- Click Choose new promotion.
- Under Essential promotions, click on Customized promotion.
- Name the promotion. This name will be for internal use only.
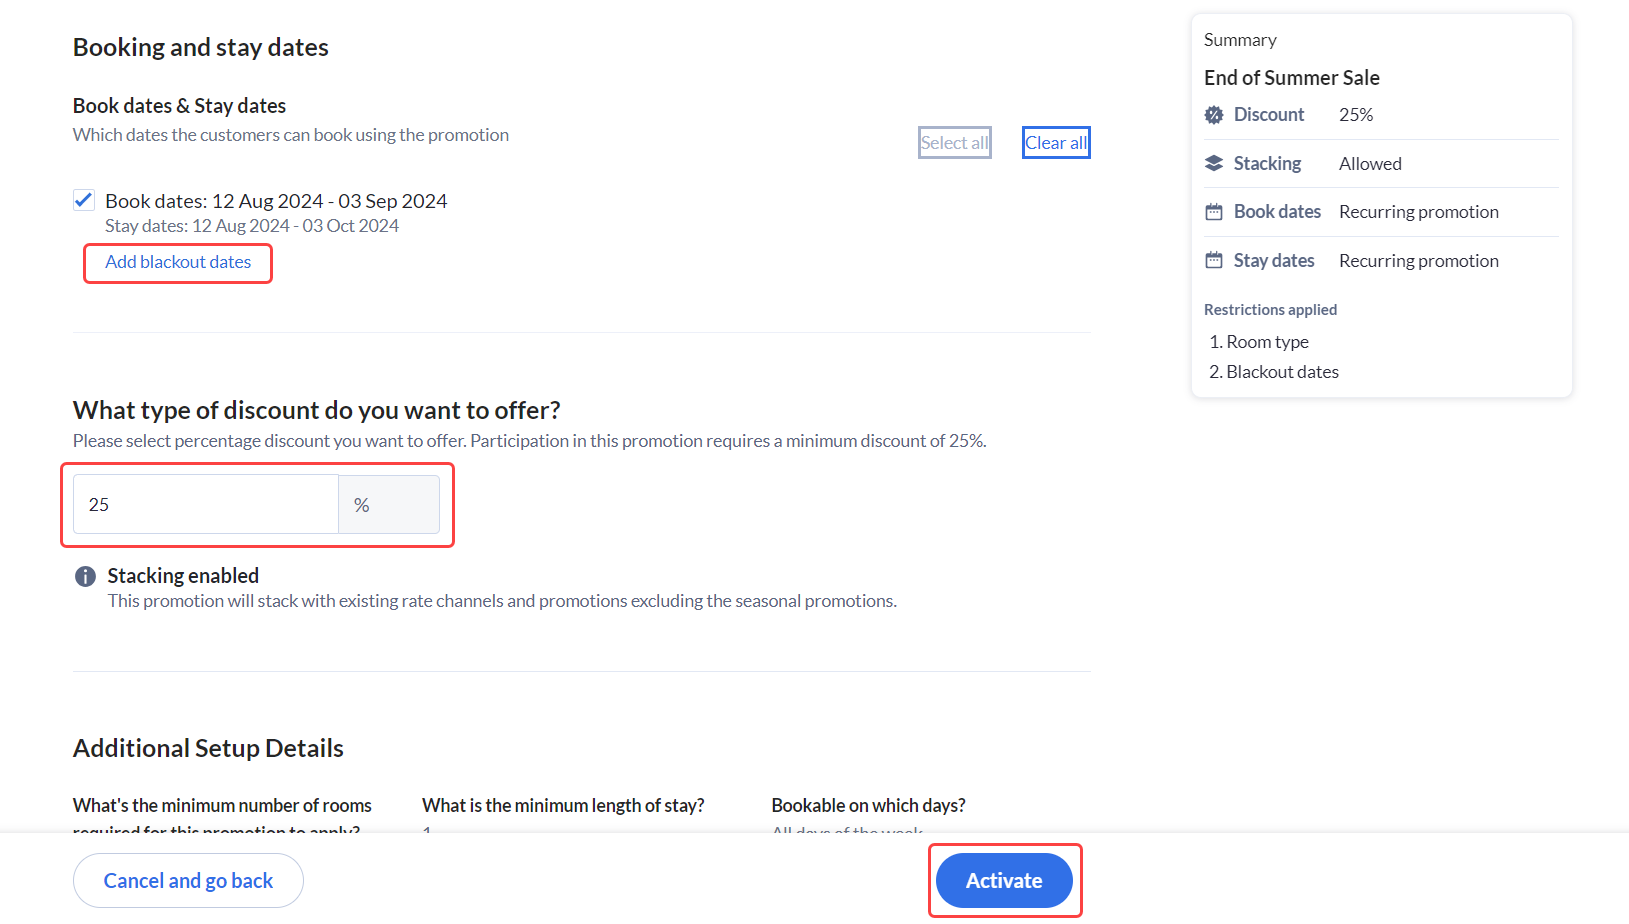
- Set the booking and stay dates.
- Set the discount you want to offer.
- Toggle stacking on if you want this promotion to always stack with other Essential promotions that have stacking toggled on.
- Customize your promotion the way you want using Additional settings and Add a restriction.
- Review your promotion, then click Activate.
Promotion types
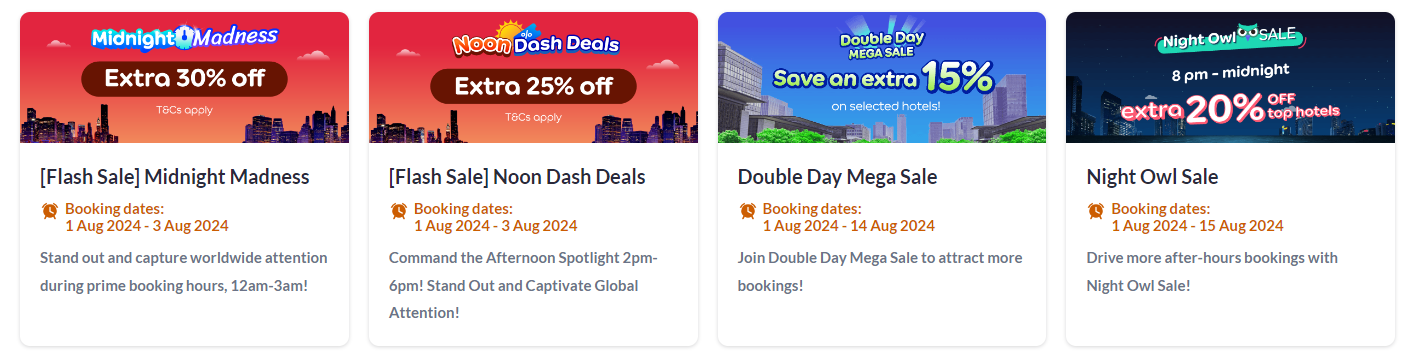
Seasonal promotions
Target customers traveling during specific seasonal festivities or holidays.
|
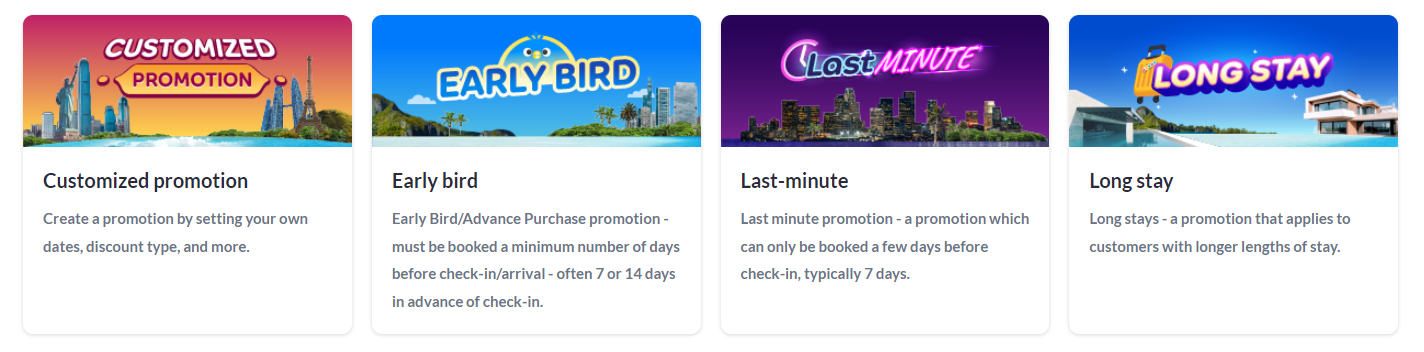
Essential promotions
Use our most popular templates to target specific travel-style customers.
|
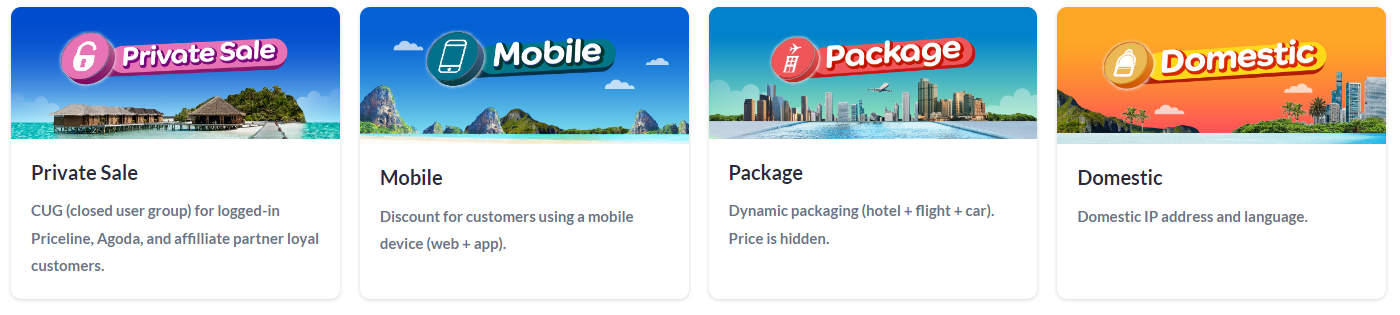
Targeted promotions
Target specific customer segments based on their booking style.
|
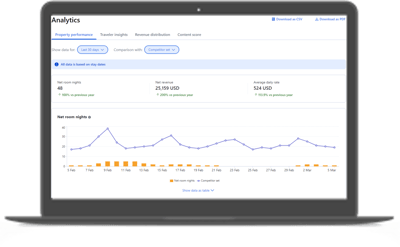
What is the Analytics Center?
The Analytics Center in Partner Portal is your go-to tool for gaining insights into your property's performance on Agoda. With clear, actionable data, it helps you make strategic decisions to drive growth. The Analytics Center gives you live data that you can view and interact with, so you can explore your property's performance whenever you need to.
Below is an overview of the key tabs and how they can help you optimize your business.
The Analytics data is also available to download directly on the page, as either a CSV or PDF file.
← Swipe or scroll to see all four tabs →
Making the most of the Analytics Center
The Analytics Center is designed to help you stay on top of key performance metrics and make informed decisions to grow your business. By leveraging these data-driven insights, you can fine-tune your approach to pricing, promotions, and guest targeting. If you need further assistance, the Need Help button is always available to guide you!
How to
- Go to Partner Portal > Performance > Analytics.
↑ Back to top
Competitor set
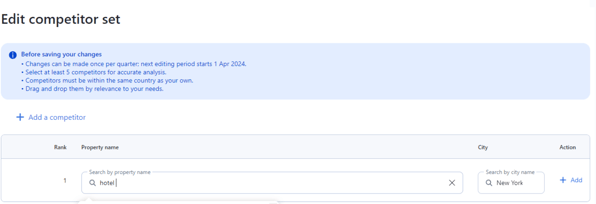
Manage your competitor set for customized insights that help you benchmark and analyze your property. These insights appear on the Dashboard and in Analytics.
How to
Navigate to Partner Portal > Performance > Competitor set.
- Click Edit competitor set.
- Click +Add a competitor.
- Search for a property located within the same country as yours and select it from the list, then click +Add.
- Continue adding properties to your competitor set. If you need to remove a property, simply click Remove.
- Once your competitor set is complete with at least five properties, review your competitor set and click Save.
↑ Back to top
Guest reviews
Verified, moderated, honest
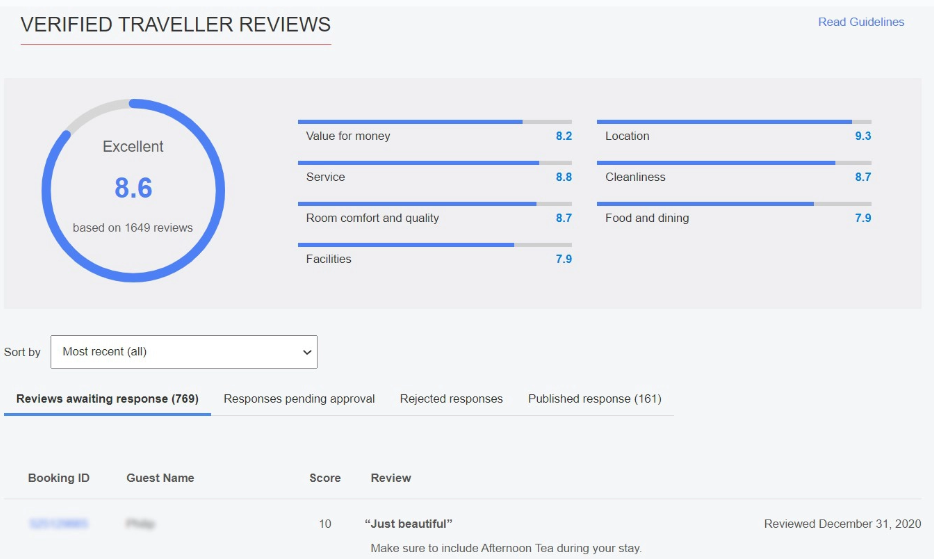
Reviews are real experiences from real customers. They're essential for informed guest decisions and give you valuable insight into your property and business. That's why we only post reviews from verified guests, and moderate them so only constructive reviews are visible.
A conversation with guests
You can respond directly to reviews. Your responses address past concerns and show potential guests that you care — and it's a free, efficient way to promote your brand.
How to
- Go to Performance.
- Select Reviews.
- Complete all relevant fields.
↑ Back to top
Managing contacts
Keep your contact information up to date so property staff have the right level of access, and so we can reach the relevant contacts about our business.
Accessing the Contacts page
- Log in to Partner Portal.
- Go to Settings.
- Click Contacts.
Creating a new contact
- Click + Create New Contact.
- Fill in the General Information and Contact Detail fields. Click Add email address or Add phone number if there's more than one. We recommend international format for phone numbers, without spaces — e.g. a US number like (212) 555-0123 would be entered as 12125550123.
- Click Create.
Editing or deleting a contact
To edit, click Edit, then Save (or Cancel to discard changes). To delete, click Delete and confirm by clicking Yes.
Searching your contact list
Use the search box in the top-left of the screen to search by name, email, or job role.
Sorting your contact list
Sort by Name, Surname, or Job Role using the sort function under the search box. Click the small arrow next to the sorting option to toggle ascending and descending.
Responsibilities and subscriptions
A contact's Responsibilities represent the topics they're responsible for — for example, Reservation, General Questions, or Authorized Signatory. Selected responsibilities determine the initial subscriptions shown in the Subscriptions tab.
Managing subscriptions
You can subscribe contacts to any items in the Subscriptions section. Once subscribed, they'll receive notifications by email — for example, booking confirmations.
- Search for and select the contact's email address using the search box.
- Click Subscriptions.
- Tick the subscription boxes based on your preferences. To unsubscribe, follow the same steps and untick the boxes.
Frequently asked questions
What if I can't find my booking in View Bookings
Do I need pre-authorization
What can I charge to a UPC
Do I charge the UPC based on price per night or per room
What if I accidentally authorized or charged only a partial amount
What's the deadline to charge a UPC
© 2026 Priceline.com and Agoda.com. All rights reserved.